These moves strengthen the external muscles involved in pelvic floor health, helping you get more from your Kegels.
Ever since you heard that Kegels—pelvic floor strengthening exercises named after the doc who created them—can improve bladder control and orgasms, you’ve been doing them every day. But the thing is, you haven’t noticed a difference. So what’s going on, exactly? Does it mean you’re not doing them correctly?
According to Karly Treacy, a yoga teacher and pelvic floor specialist, the issue is likely that you’re focusing too much on the muscles inside your pelvis—and neglecting the ones outside.
“When you look at the pelvic floor, it’s a matrix of muscles connecting your two sit bones, as well as your pubic bone and tailbone,” says Treacy. “Over time—and due to things like pregnancy, sitting too much and obesity—those muscles stretch out and lose their tone.” What’s more, the joints on either side of your spine, which are held together by connective tissue, get lax, which can actually widen the space between your sit bones by up to an inch. This makes it challenging to tone the pelvic floor muscles even if you’re a Kegel devotee, says Treacy.
To minimise the space between your sit bones and strengthen the surrounding muscles, Kegels simply aren’t enough. You’ll also need to strengthen your glutes, hamstrings and an outer hip muscle called the tensor fascia latae, Treacy explains. “Since these muscles provide structural support to the pelvis, they’re just as important for your pelvic floor health as the internal muscles that Kegels target."
Here are five yoga poses Treacy suggests doing each week (in addition to Kegels) to help strengthen all of the muscles involved in optimal pelvic floor health:


Warrior 2
- Come to a lunge position, with your right leg a few feet in front of your left. Your knee should be bent 90 degrees, and your toes should be pointing forward.
- Rotate so your torso is facing forward and your left heel. Keep the bend in your right knee, aligning it with your second and third toes, and straighten your back leg.
- Inhale and raise your arms out to the side, keeping wrists at shoulder height.
- It may be tempting for your right hip to stick out; continue to keep your core engaged and hug it in towards your midline. Stay here for 12 to 15 breaths.
Extended side angle pose
- From Warrior 2, bring your right hand either to a yoga block on the floor or the outside of the right shin bone. Alternatively, you can place your right elbow on the inside of your right knee.
- Extend your left arm straight toward the sky and press your back left foot down into the ground.
- As you inhale, imagine creating more length and space in your torso; as you exhale, roll your chest open toward the sky.
- Hold for up to 12 breaths.
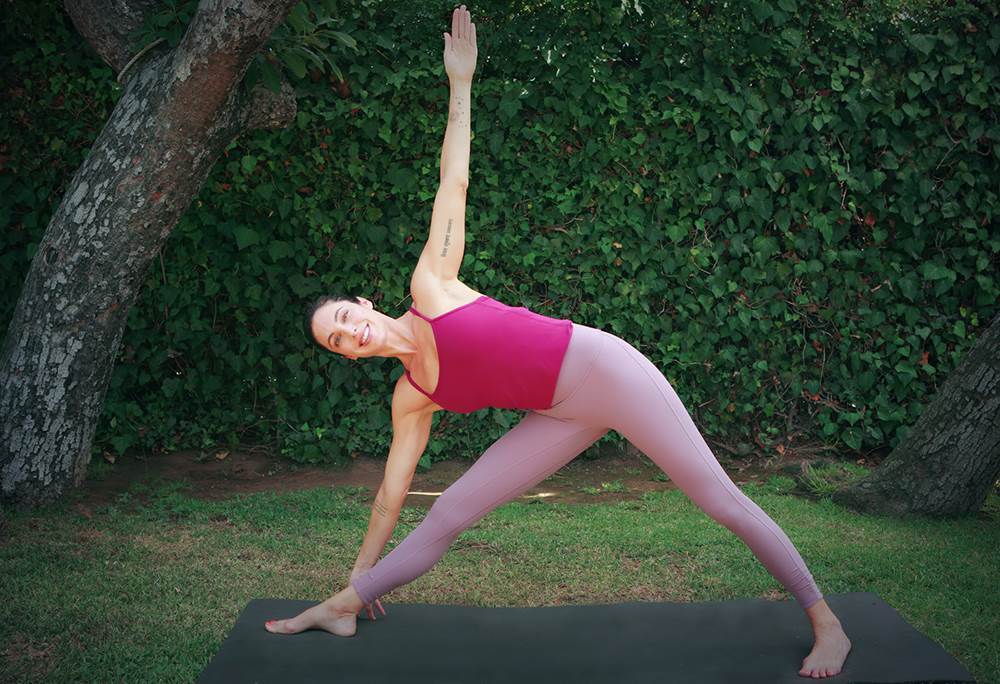
Triangle pose
- From extended side angle pose, straighten your right leg. If your right hand has been resting on a yoga block, you may need to adjust the height. If your elbow has been on your knee, move your hand so it’s resting on the floor or a yoga block.
- Hold here for up to 12 breaths.
- Then, repeat Warrior 2, Extended Side Angle, and Triangle on your left side.
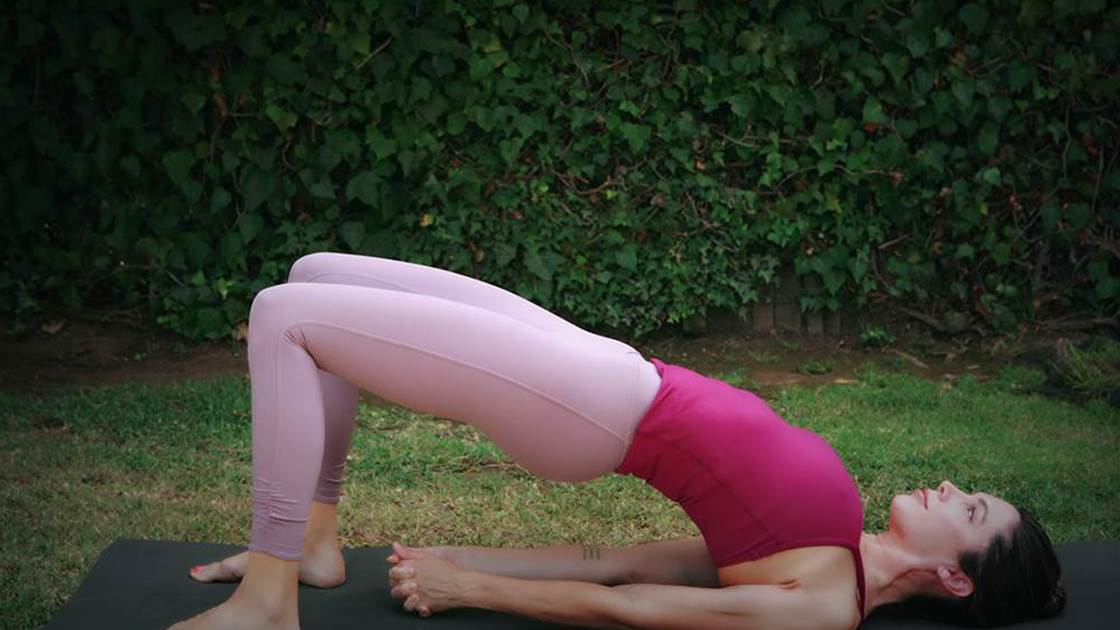
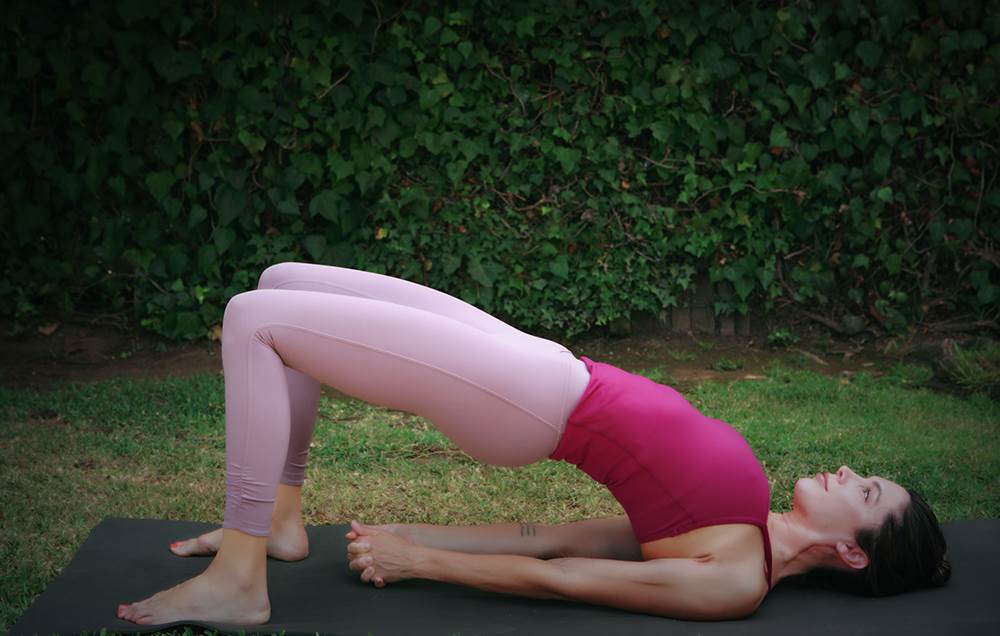
Bridge pose
- Lie on your back and bend your knees so that your feet are on the floor parallel to one another, hip-width apart. Your heels should be as close to your sit bones as possible, and your arms should remain flat by your sides.
- Keep your knees directly over your heels as you lift your buttocks up until your thighs are parallel to the floor.
- Push your knees forward, away from your hips, and lengthen your tailbone toward the backs of your knees. Stay here for up to 12 breaths.
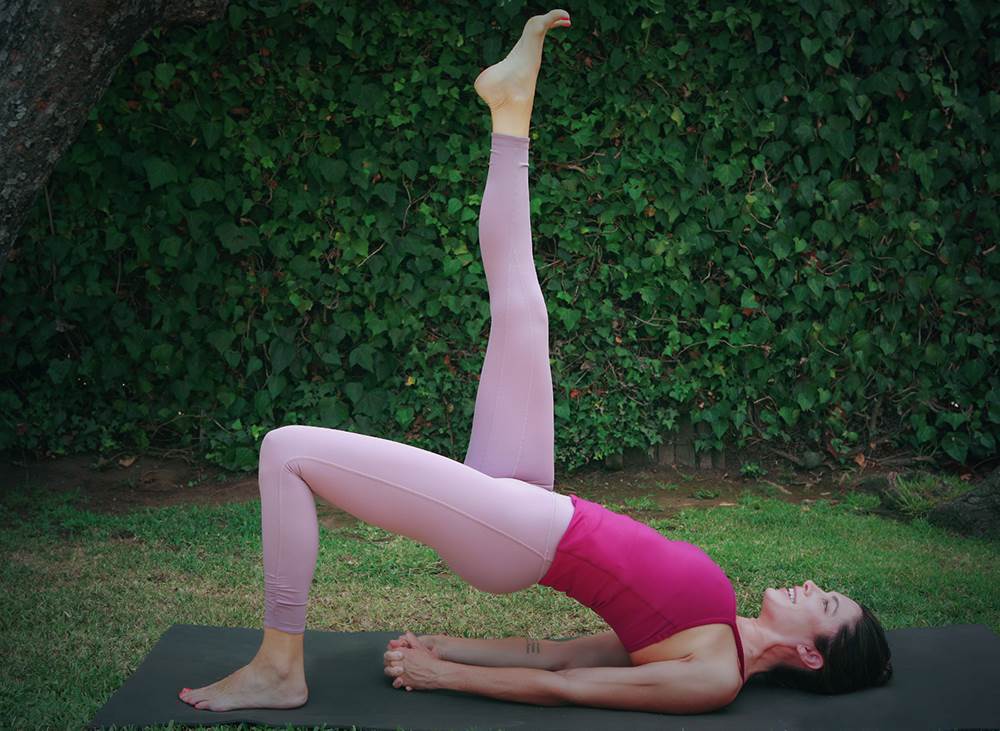
Single-leg bridge
- Go into bridge pose again and find your balance. When you feel stable, extend your right leg straight up toward the sky.
- Hold for 6 to 8 breaths, then return to bridge pose. Repeat on the left, holding your left leg toward the sky for 6 to 8 breaths.