If you have bad knees, weak wrists, or just plain dread doing burpees, try these low-impact moves instead for similar results.
There is a lot to love about burpees. They are equipment-free, full-body, metabolism-revving, time-saving, do-anywhere exercises!
A burpee takes a person from (1) standing to (2) tucked to (3) plank to (4) push-up to (5) tucked to (6) jumping. Steps 3 and 5 pose a problem if high impact hurts your knees, and step 3 does, too, if push-ups strain your wrists. And if you're new to exercise, the whole complicated thing poses a problem!
We have devised four burpee alternatives that keep the essence of the exercise, but make it accessible to everyone. Substitute any one of these modifications in place of a burpee anytime that exercise is instructed in your workout.
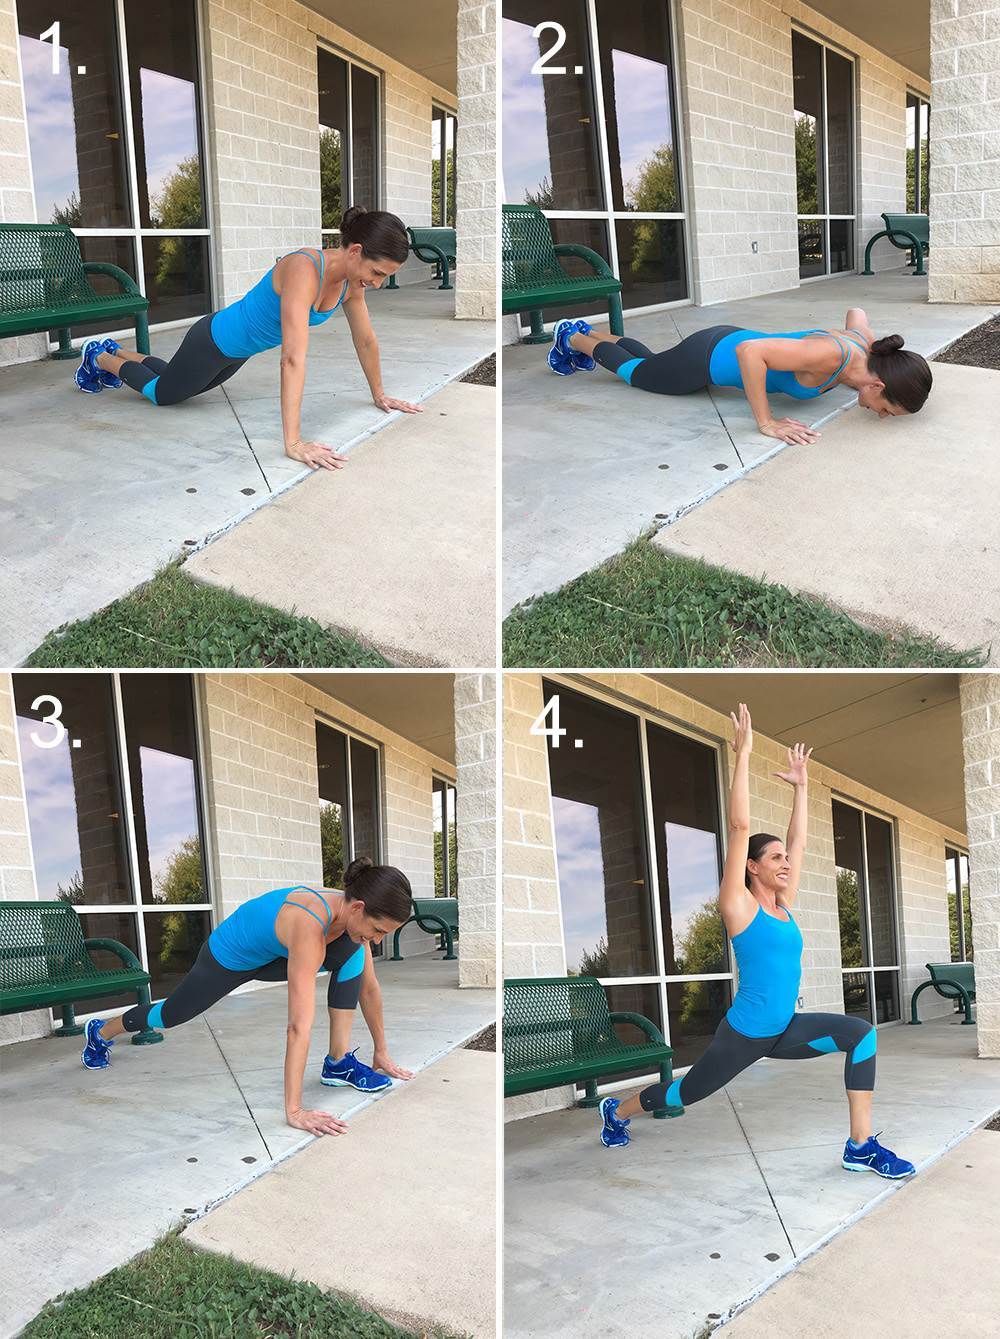

Bottom-Half Burpee to Lunge
This low-impact variation skips the standing and jumping of a regular burpee and is knee-, hip-, and low back-friendly. But you still get the benefits of the push-up for chest and shoulders, strength for your legs, glutes and core, plus metabolism-revving!
How to do it:
- Begin in push-up position on your knees.
- Perform one push-up, then step out to plank.
- Step one leg forward to low lunge.
- Reach your arms high overhead and hold momentarily. Return your hands to the ground, step back and repeat, lunging forward with the opposite leg.
Make it a little harder: Perform the push-up on your toes in Step 1, instead of your knees.
Band Fly to Squat Lift
This beginner-friendly standing burpee ditches the plank, push-up and jumping, but it adds a resistance band chest fly to keep the strengthening for your chest and shoulders. And you'll still work your legs, glutes and core as well!
- Wrap a resistance band around your back and hold ends in your hands (wrapping slack around your hands, if necessary). Open your arms out wide.
- With just slight bend in your elbows, bring your hands together in front of your chest. Hold momentarily, then return them out wide.
- Squat down as deep as you can safely squat without discomfort in your knees or hips.
- Rise up from your squat and lift up high on your tippy toes. Hold momentarily, then drop your heels to return to starting position.
Make it a little harder: Leap up in the air after Step 3, and land softly. (Note: This would make the move high-impact, and should be avoided by most beginners and those with knee, hip, or lower back pain.)
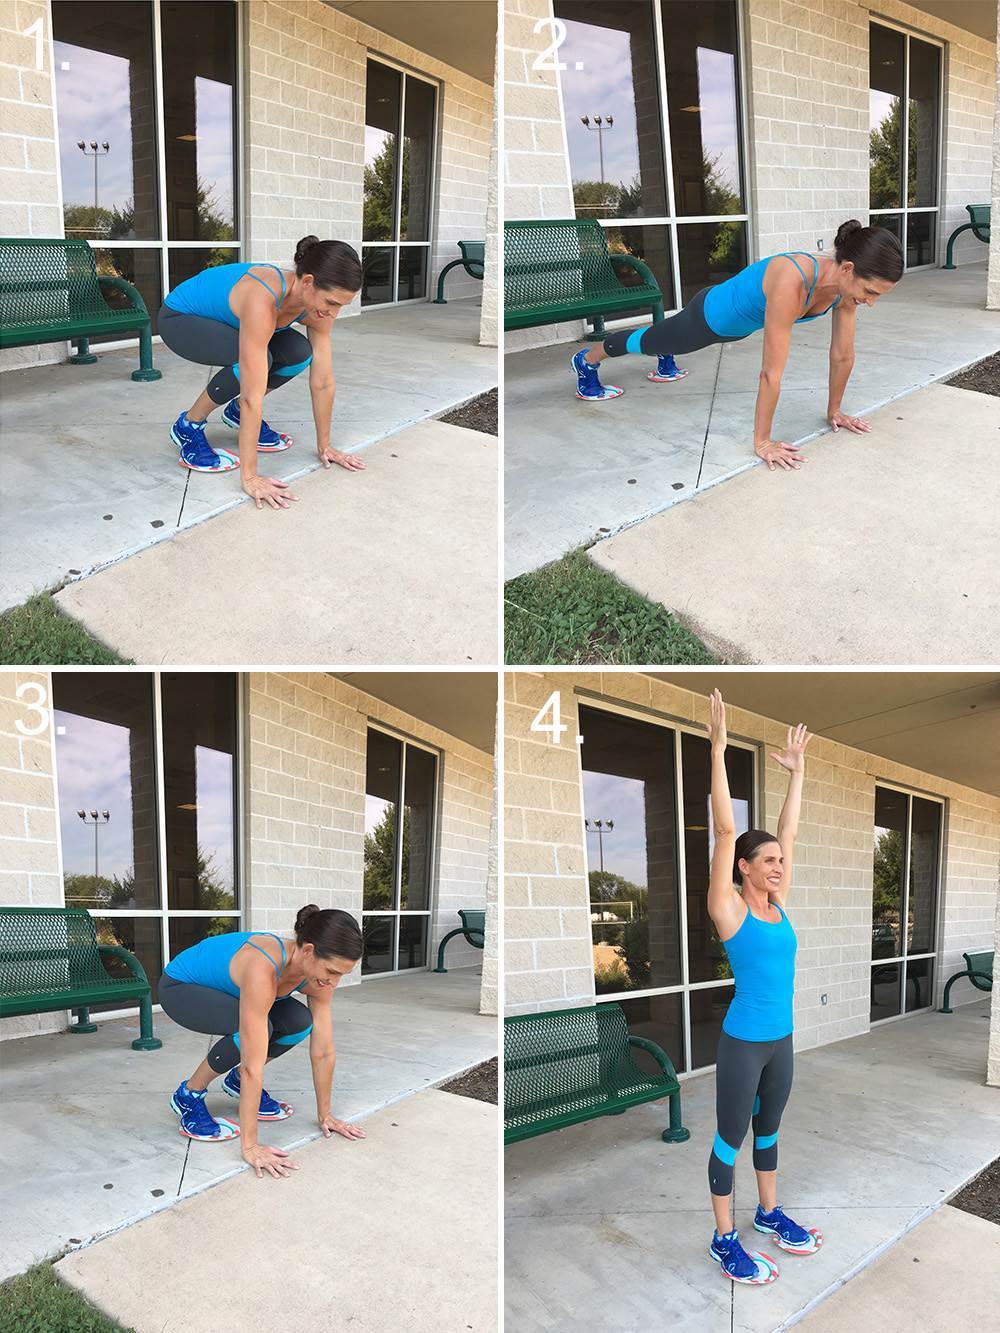
Glide to Plank, Ta-Da
And you thought paper plates were just for parties! This alternative does away with the jumping and push-up, so it's easier on your knees, hips and low back. Yet you still strengthen your chest, shoulders, legs, glutes and core for a full-body, metabolism-revving move.
- Place the balls of your feet on paper plates. Tuck down and touch your hands to the ground.
- Slide out to plank position.
- Slide in, returning to tuck.
- Stand and reach up. (Ta-da!)

Make it a little harder: Omit paper plates and jump out from tuck to plank in Step 2. (Note: This would make the move high-impact, and should be avoided by most beginners and those with knee, hip or lower back pain.)
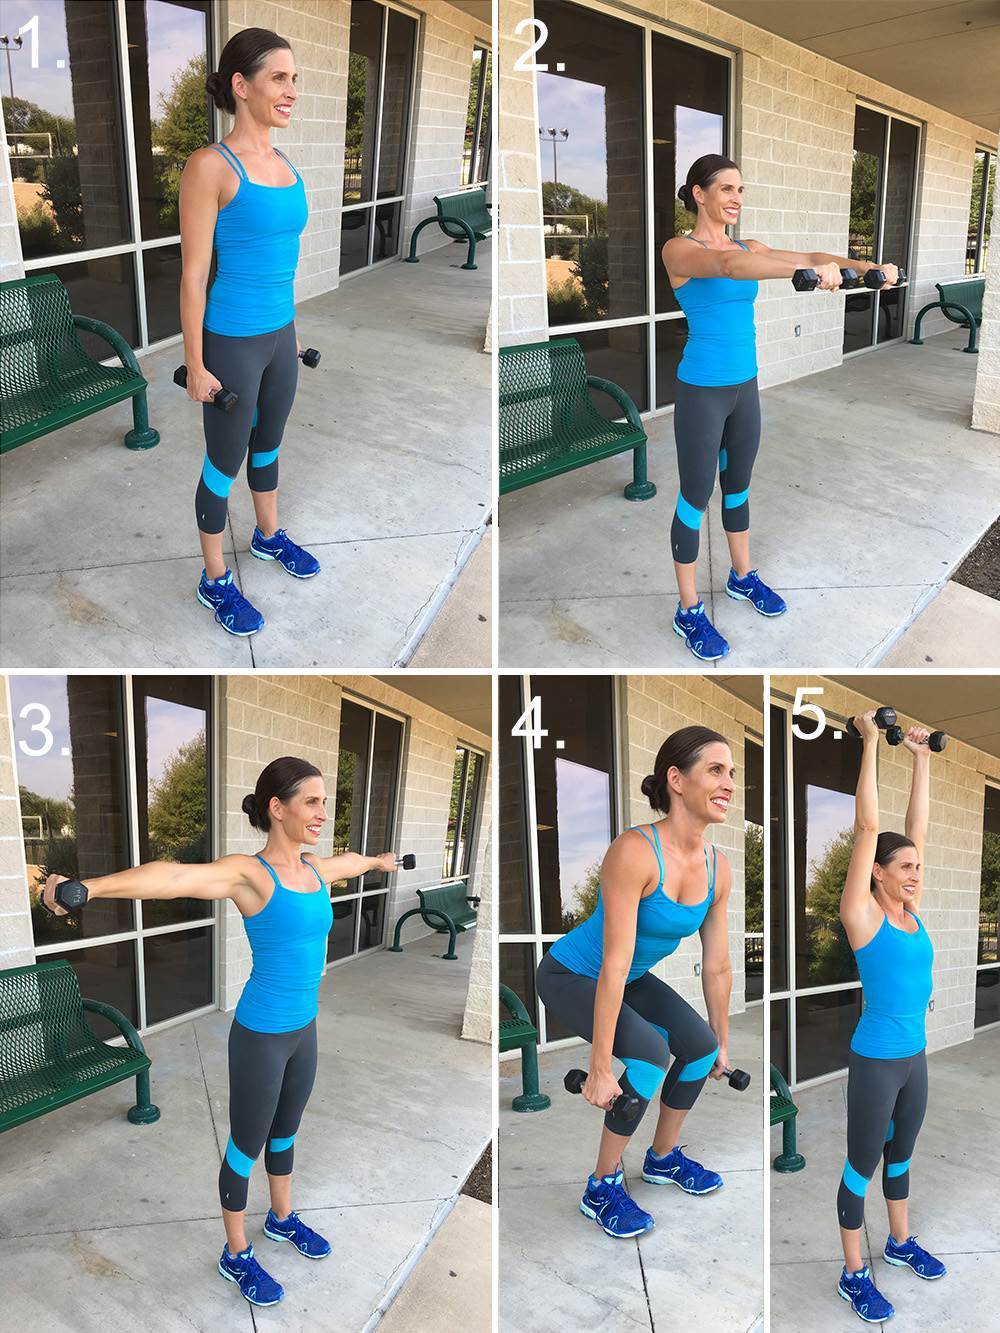
Front Raise, Lateral Raise, Squat & Press
Grab a set of dumbbells for this beginner version. You lose the jumping, plank, and push-up, but add extra shoulder strength while keeping the move knee-, hip-, and low back-friendly.
- Hold a set of 2kg dumbbells (or cans of soup) in your hands and stand tall.
- Lift the dumbbells straight in front of you to shoulder height. Hold momentarily, then lower.
- Lift the dumbbells out to the sides to “Iron Cross” position. Hold momentarily, then lower.
- Perform a shallow squat, keeping your chest lifted and knees in line with your toes.
- Lift up and press the dumbbells overhead. Hold momentarily, then lower to starting position.
Make it a little harder: Squat deeper in Step 4 to tap the dumbbells to the ground.