Almost every woman who has taken a barre class will tell you the same thing: It hurts so good.
That’s because the ballet-inspired fitness class firms up hard-to-tone zones using low-impact, form-focused movements. The result is a slow, deep muscle burn from head to toe.
Now you can pair that deep muscle burn with more fat burn. In my latest project, I mix traditional barre exercises with joint-friendly cardio intervals to help you build lean muscle mass, maximize your time and rev your metabolism.
Give my method a shot with the abs circuit below. You’ll use movements to strengthen your core—the dozens of muscles between your shoulders and your hips—improve your posture, and torch more kilojoules. (No crunches in sight!) By the time you’re done, you’ll actually feel tighter throughout your midsection.
How to do it:
- Warm up with a 5-minute walk or light jog.
- Then, perform each movement for one minute, and then rest 20 seconds before moving on to the next exercise. Finish all four moves to complete a circuit.
- Repeat the circuit again for a 10-minute abs workout, or do it three times for a rough belly-blasting challenge.

Photograph courtesy of Suzanne Bowen Fitness
Exercise 1: Mountain Climber
How to do it:
- Assume a push-up position with your arms straight.
- Brace your core by contracting your abs, and bring your right knee in toward your chest. Pause, and return to the starting position.
- Repeat with your left knee. Alternate legs, keeping the movement slow and controlled the entire time.
Make it easier: Without moving your feet, bend your right knee toward the floor. Pause, and then straighten your right leg again. Alternate knees.
Make it harder:Without letting your form slip, speed up the movement. (If your form starts to fail—your hips pike or dip—slow down the tempo.)
Check your form:Make sure your hips don’t lift into the air or move erratically. Control the movement—don’t let it control you!—and land lightly so your midsection works hard to keep your body stabilised and your torso parallel to the floor.
Photograph courtesy of Suzanne Bowen Fitness
Exercise 2: Wide Second Side Bend
How to do it:
- Stand with your feet twice shoulder-width apart, toes pointed outward.
- Without allowing your back to round, bend at your knees until your thighs are almost parallel to the floor. Pause here. This is wide second position.
- Bring your hands together in front of your chest as if you are praying.
- Inhale, and bend your torso to the left.
- Exhale as you come back to wide second position.
- Inhale, and bend your torso to the right this time.
- Continue to alternate sides, always coming back to center.
Make it easier:Don’t go as low in wide second position (keep your thighs above parallel). For better balance, bring your arms up until they’re parallel with the floor and your torso and arms make a “T.”
Make it harder:Pulse upward and downward for 5 reps when you’re in the center of wide second position. The movement should barely be visible—about an inch up and down.
Check your form:Slow down. Zooming through the exercise will keep you from reaping all the tummy-tightening benefits. Your abs work harder when you engage them in a steady pace. If you feel tight in your hips or inner thighs, slightly lean your entire torso forward as you perform the movement.
Photograph courtesy of Suzanne Bowen Fitness
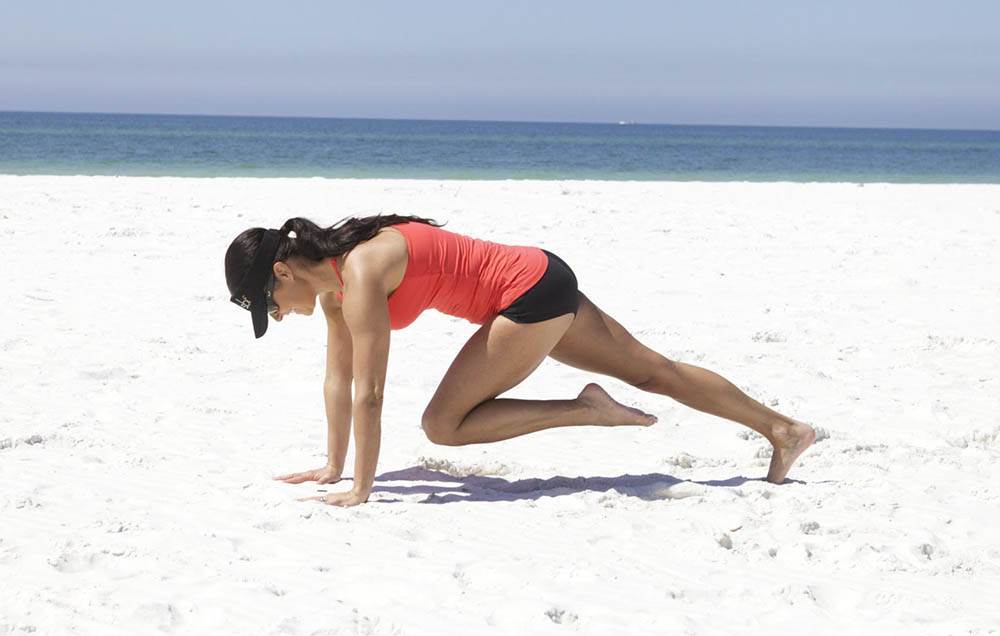
Exercise 3: Extended-Leg Down Dog to Up Dog
How to do it:
- Come down on all fours, with your hands slightly wider than shoulder-width apart. Spread your fingers wide.
- Tuck your toes, lift your hips up and back, and extend your legs so that your body forms an upside down “V.” This is down dog.
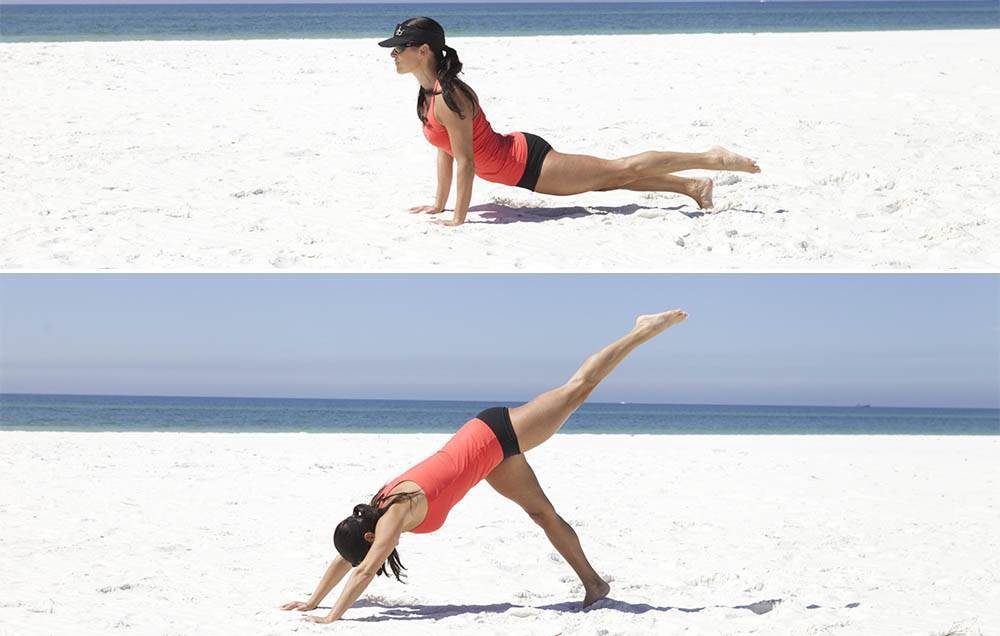
- Lift your right heel up toward the ceiling.
- Without letting your right leg touch the floor, inhale, drop your hips, lift your chest up and forward. Your wrists should be under your shoulders to protect your lower back. This is up dog.
- Without letting your right leg touch the floor, exhale and push your hips toward the ceiling into down dog.
- Continue to flow between down dog and up dog for 30 seconds with your right foot off the floor, and then switch legs for the remaining 30 seconds.
Make it easier:Keep both feet on the floor as you flow between movements.
Make it harder:Alternate which foot is on the floor every single rep. Move with power as you flow from down dog to up dog and back again.
Check your form:Do you feel a painful tug on the back of your leg when you lift it in the air? That means your hamstrings are tight. Don’t force your leg any higher. Instead, only lift it where you feel most comfortable and you can keep your toes pointed toward the floor. Do this movement often enough, and your hamstring flexibility will improve.
Photograph by Suzanne Bowen Fitness
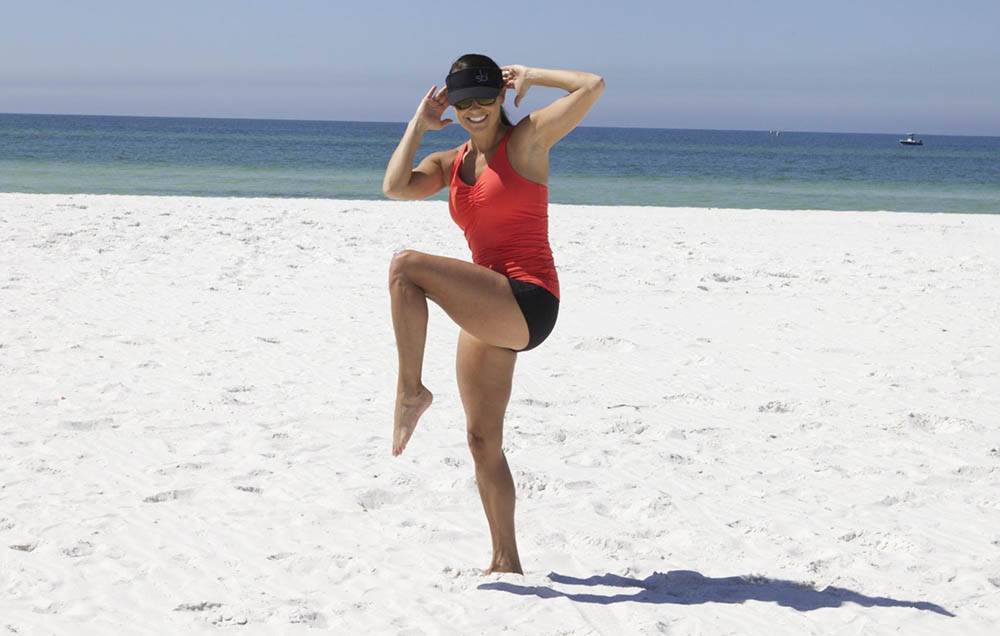
Exercise 4: Standing Twist Balance
[description]How to do it:
- Place your fingers on the back of your head, pull your elbows and shoulders back and stand with your feet shoulder-width apart.
- Take a slight step back with your left foot, keeping your weight on your right leg. This is the starting position. Inhale deeply.
- As you exhale, simultaneously bring your left knee up and your right elbow down to meet it (or as close as you can get them). Allow your torso to twist gently, feeling your obliques—the muscles that run along the sides of your torso—work.
- Return to the starting position. Repeat with your left leg and right elbow for 30 seconds, and then switch sides for the remaining 30 seconds.
Make it easier:For better balance, bring your arms up until they’re parallel with the floor and your torso and arms make a “T.” You can also pick up the pace a little bit if the momentum helps you stabilise.
Make it harder:Instead of just slightly stepping back with your foot, perform a reverse lunge. Then bring your knee up to meet your opposite elbow.