From microdermabrasion treatments to hydrafacials to microneedling there are a whole host of in-office skincare services designed to help you achieve healthy skin. These treatments, typically performed by dermatologists and aestheticians, offer many benefits, but dermatologists say an at home facial can also help boost your complexion.
“Regular facials help to maintain healthy skin, rehydrate the skin, effectively unclog pores, accelerate cellular turnover, help slow down signs of premature ageing, and can effectively target concerns such as discolouration,” explains aesthetician Nichelle Temple. “I think DIY facials are very beneficial. Your aesthetician is lucky to see you once a month, whereas you can care for your skin twice a day. Setting aside dedicated time once a week to properly care for the skin with a DIY facial is wonderful!”
Here experts explain the correct order to apply skincare products for a luxurious and effective at-home facial, the best tools and products for the job, as well as what not to do.
How to give yourself an at-home facial
Step 1: Double cleanse
Double cleansing may seem like overkill to some, but it’s actually an effective way to remove traces of the day from your pores (especially if you wear sunscreen or makeup during the day). So it comes as no surprise that all of our experts suggest using the technique to begin your at-home facial. Using a pre-cleansing oil or cleansing balm “will help to break down any products and excess oils on the skin,” Temple explains.
“Take your time with the massage and knead any spots of tension. Rinse and follow with a water-based cleansing gel.” A thorough cleansing step lasting about one and a half to two minutes will help “prep the skin properly” for the rest of your facial, adds aesthetician Joanna Vargas.
Step 2: Exfoliate
There are a few different ways you can exfoliate your skin, but our experts agree that this step is essential for an at-home facial. “You can choose a chemical or mechanical exfoliant to help remove any excess oil or dead skin cells and help reveal newer, more radiant skin,” says dermatologist Dr Janiene Luke.
Those with more sensitive skin can try using an exfoliating cleanser to finish off your double cleansing step, says dermatologist Dr Karan Lal, who suggests reaching for a cleanser with 2% salicylic acid or one with a combination of alpha hydroxy acids (AHA) and beta hydroxy acids (BHA). You can also use an exfoliating toner as Temple suggests, or follow Vargas’ method of applying an exfoliating scrub or mask.

Step 3: Apply a face mask
Next up is a face mask. “You want to target this step to what your skin needs,” Dr Lal says. People with oily or acne-prone skin may want to reach for a mask containing charcoal or kaolin clay which helps draw excess oil from pores.
People with dry skin can opt for a cream or gel mask containing hydrating ingredients like hyaluronic acid, aloe, and glycerin. While the mask sits, our experts encourage you to use this time for some relaxation and self-care. Try sipping on a cup of tea, massaging your skin while the mask dries down, or hopping in the bath or shower to unwind and let the steam elevate the experience (more on that below).
If you’re thinking about making your own face mask using ingredients from your kitchen, Dr Luke suggests reconsidering. “I tend to caution DIY mixtures when doing at-home facials and recommend using formulated products that can help address skin concerns instead of mixing and applying raw food or other ingredients to your skin,” she says.
Step 4: Steam the face
While adding a bit of steam may not be necessary, there’s a reason so many aestheticians choose to use it during their services. “It can definitely enhance the experience of an at-home facial as well as help open up pores, soften skin, and allow for better penetration of products,” Dr Luke explains
If you do choose to go the steam route, our experts suggest using it after you’ve applied your face mask of choice. Vargas recommends hopping in the tub after applying a mask where “the steam [helps] to keep the mask ingredients super active.” You can also use a facial steaming device or simply hold your face above a bowl full of hot water.
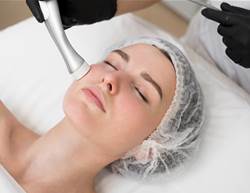
Step 5: Use facial tools and treatments
If you’d like to use any facial devices, now is the time to do so. Once you rinse off your face mask in the shower or at the sink, pat your skin dry, and consider using an LED face mask (like the Airyday Bright On LED Face Mask) a high-frequency wand, or a microcurrent device if you have any of these tools handy.
“LED is so great for reducing inflammation, refining the surface of the skin, evening out pigment, and increasing collagen production,” Vargas explains. “It’s non-invasive so there are [usually] no side effects. It’s a great tool for at-home use.” Temple and Dr Lal are also fans of using microcurrent or high-frequency devices during this step.
Step 6: Apply targeted serums
Now is the time to apply your favourite serums and treatments. You can also use this step to apply a sheet mask as Vargas suggests, as all of the cleansing and exfoliating you’ve done up until this point will help the serum in the mask penetrate even more deeply into the skin.
After (or in place of) the sheet mask, Temple and Vargas say to apply your regular serums or targeted treatment serums (usually those that are meant for once or twice-weekly use). Vargas says to apply these “lightest to heaviest” for optimal product absorption.
Step 7: Moisturise and massage
As with your normal skincare routine, follow up any serums with your moisturiser of choice. You can certainly use your daily moisturiser that you know works for you during this step, but Dr Lal encourages you to choose a rich, reparative formula. “You want something rich in lipids, ceramides, and hydrating ingredients like glycerin and squalane. These are great post-facial to nourish the skin barrier and help the skin heal,” he explains.
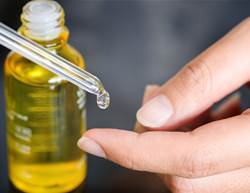
If you’d like to give yourself a facial massage, you can do so as you apply your moisturiser. Vargas also suggests finishing with a facial oil rich in antioxidants and using that to massage your face with your hands or a gua sha tool (like the Swiish gua shua). “It will de-puff the face and really help the lymphatic system bring in fresh nutrients,” she explains.
Lastly, “Don’t forget your lips!” Dr. Luke says. “Incorporate your favourite lip balm or moisturiser into your regimen to keep lip skin soft and supple.”
What to avoid during an at-home facial
While at-home facials are effective ways to maintain skin health, there are a few things you should leave to the professionals.
Our experts agree that while certain tools (like red light therapy masks, microcurrent devices, high-frequency wands and cleansing brushes) are effective add-ons for an at-home facial, some are best left alone. Temple explains that both dermaplaning and microneedling should be avoided at home to reduce risk of injury. Other tools like over-the-counter “hydra facial” devices or ultrasonic spatulas that claim to extract or infuse are ineffective at best and may be damaging at worst, Dr Lal adds.
As for extractions? “Leave pimples alone and let them heal on their own,” Vargas says. Dr Luke agrees, explaining that doing extractions at home can lead to discolouration and scarring. “Use pimple patches or antibacterial masks instead,” Temple suggests.
Lastly, Dr Lal and Dr Luke caution against doing professional-strength chemical peels at home as these may lead to severe burns, discolouration and scarring. For at-home exfoliation, experts recommend using a low-concentration, over-the-counter chemical exfoliant, a gentle exfoliant for sensitive skin (like Synergie Skin Luciderm) or a cleanser containing exfoliating acids.