In a study published in the Indian Journal of Physiology and Pharmacology, researchers compared lung function and diffusion capacity (how well the lungs process air) of people with asthma before and after 2 months of practicing yoga.
They found that pranayama yoga breathing and stretching postures increased respiratory stamina, relaxed the chest muscles, expanded the lungs, improved energy levels, and helped calm the body.
When you practice yoga, especially one of the less-vigorous forms, you relax your mind and your immune system. According to Yoga Journal, the best way to use yoga for relaxation is to perform it smoothly and slowly.
Further, yoga instructors discourage allergy and asthma sufferers from engaging in certain yoga forms, including Bikram or "hot yoga," as well as Ashtanga yoga, which is an intense and physical yoga form.
As you practice yoga, try to steer clear of forceful breathing through your nostrils, which can be uncomfortable and difficult if you are congested. Instead, do a short inhalation followed by a long, slow exhalation, which is more calming for your body and mind.
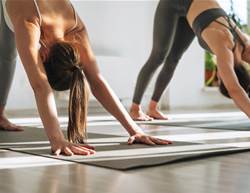
In general, standing poses that involve forward and backward bends and twists, like the Shoulder Stand Pose and the Plow Pose, massage your spine and thoracic cage and help condition your lungs, thus strengthening your immune system. There are also a few specific yoga poses that can help with asthma and allergy symptoms.
Warrior 1
This pose helps your chest and lungs to open and uses gravity to drain mucus out of your nose and lungs. To perform the pose:
1. Stand with your feet together and arms at your sides.
2. Step forward with your right foot so your feet are 3 feet apart, and bend your right knee until your thigh is parallel to the floor. Try to keep your back left heel pressed to the floor.
3. As you're bending your right knee, raise your arms above your head, keeping them shoulder-width apart, with your arms straight and your palms facing each other. (Your arms should be next to your ears.)
4. Inhale and exhale slowly. Hold this pose for 3 to 10 slow, deep breaths.
5. Come back to standing and repeat the pose on your left side.
Half Moon
This pose eases breathing by opening your rib cage and lungs, so it will help clear your head if you have hay fever symptoms such as sneezing, runny nose, and watery eyes. To perform the pose:
1. Stand with your feet shoulder-width apart and arms at your sides.
2. Place your left hand on your left hip and turn your right leg 90 degrees out to the right.
3. Extend your right arm straight out to your side at shoulder height.
4. Bending at your waist, reach down with your right hand and place your fingertips on the floor a few inches in front of your right foot.
5. Lift your left leg straight behind you so that it is parallel to the floor, and open your hips to the left. Extend your left arm so that it is in line with your right arm. Turn your head and look up at your left hand. Hold for 3 to 5 breaths.
6. Slowly lower your left arm back to your left hip and look toward the floor. Slightly bend your right knee and gently lower your left leg. Straighten your right knee.
7. Come back to standing and repeat the pose on the opposite side.
Shoulder Stand
Both Shoulder Stand and Plow Pose are used to open nasal passages and help drain the sinuses. Fold two or more blankets into rectangles and stack them to create your support. You may want to place a sticky mat on top of the blankets to help your upper arms stay in place while you are performing the pose. To perform the pose:
1. Lie down so your head is on the floor and your shoulder blades are on the blankets. (The short edge of the blanket should be parallel to your arms.) Place your arms flat on the floor so they are parallel to your torso, bend your knees, and put your feet flat on the floor.
2. As you exhale, press your arms against the floor and push your knees away from the floor. Draw your thighs in toward your torso.
3. Continue to lift your legs upward by curling your pelvis, and push the back of your torso away from the floor so your knees come toward your face. Put your arms out so they are parallel to the edge of the blanket, and turn them so your thumbs are behind you and your fingers press against the floor.
4. Bend your arms and draw your elbows toward each other, then place your palms flat on your lower back and the backs of your upper arms on the blanket. Raise your pelvis over your shoulders so your torso is perpendicular to the floor. Walk your hands up your back and down toward the floor, keeping your elbows shoulder-width apart.
5. As you inhale, lift your bent knees toward the ceiling, bring your thighs in line with your torso, and let your heels hang down by your buttocks. Press your tailbone toward your pubic bone and turn your upper thighs slightly inward. As you inhale, straighten your legs and press your heels up toward the ceiling. Once the backs of your legs are fully extended, push your feet upward through the balls of your big toes so your inner legs are slightly longer than your outer legs.
6. Push your shoulder blades and the backs of your arms into the blanket support and move your chin toward your sternum. In this position, your forehead should be parallel to the floor, and your chin should be perpendicular to the floor. Try to lift your upper spine away from the floor and look at your chest.
7. Hold the pose for 30 seconds. As you get stronger, gradually add 5 to 10 seconds to the pose until you can do it comfortably for 3 minutes. To exit the pose, as you exhale, bend your knees toward your torso and keep the back of your head against the floor as you roll your back slowly down onto the floor. You may also move right into Plow Pose without exiting Shoulder Stand.